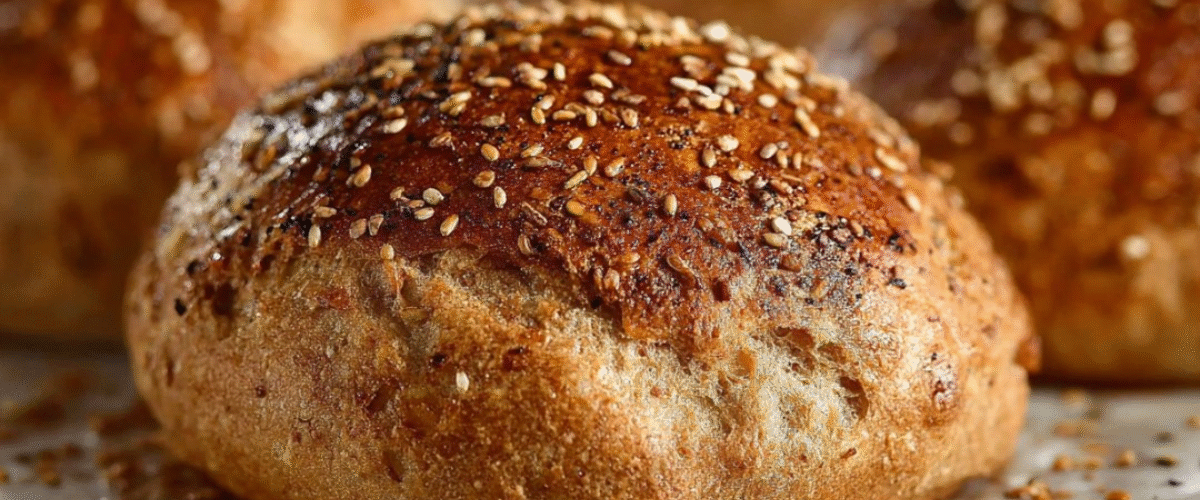
Proteinbrot ist eine fantastische Option für alle, die ihre Proteinzufuhr steigern und gleichzeitig köstliches selbstgebackenes Brot genießen möchten. Dieses Rezept ist einfach zu befolgen und ergibt ein weiches, aromatisches Brot, das sich perfekt für Sandwiches, Toast oder als Beilage eignet. Wenn Sie Proteinbrot selbst backen, können Sie die Zutaten selbst bestimmen und es ist gesünder als gekaufte Optionen. Egal, ob Sie Fitnessbegeisterter sind oder einfach nur nach einer gesunden Art suchen, Brot zu genießen – dieses Rezept ist genau das Richtige für Sie.
Warum dieses Rezept machen
Die Herstellung von Proteinbrot bietet mehrere Vorteile. Erstens trägt es zu einer ausgewogenen Ernährung bei, da es die Proteinzufuhr erhöht. Protein ist wichtig für den Aufbau und die Reparatur von Gewebe und somit ein wesentlicher Bestandteil einer gesunden Ernährung. Durch die Verwendung von griechischem Joghurt in diesem Rezept fügen Sie nicht nur Protein, sondern auch Probiotika hinzu, die sich hervorragend für die Darmgesundheit eignen. Darüber hinaus ist dieses Brot vielseitig einsetzbar. Sie können es mit verschiedenen Belägen genießen und es so zu einer sättigenden Mahlzeit oder einem Snack machen. Schließlich ist es günstiger, selbst Brot zu backen, als Fertiggerichte zu kaufen – eine Win-Win-Situation für Ihren Geldbeutel und Ihre Gesundheit.
Wie man Proteinbrot macht
Proteinbrot zu backen ist unkompliziert und erfordert keine fortgeschrittenen Backkenntnisse. Folgen Sie den einfachen Schritten unten, um Ihr eigenes köstliches und nahrhaftes Proteinbrot zu backen.
Zutaten:
- 200 g Vollkornmehl oder Allzweckmehl (1 ½ Tassen)
- 1 ½ TL Backpulver
- 200 g griechischer Joghurt (mindestens 5 % Fett empfohlen) (ca. ¾ Tasse)
- Meersalz (optional, nach Geschmack)
Anwendung:
- Heizen Sie Ihren Backofen auf 190 °C oder Ihre Heißluftfritteuse auf 140 °C vor. Wenn Sie den Backofen verwenden, legen Sie ein Backblech mit Backpapier aus.
- Mehl, Backpulver und optional Meersalz in einer großen Rührschüssel vermengen. Gut verrühren.
- Den griechischen Joghurt zu den trockenen Zutaten geben. Mit einem Löffel oder Spatel verrühren, bis ein weicher Teig entsteht. Der Teig sollte weich, aber dennoch handhabbar sein.
- Wenn der Teig klebrig ist, streuen Sie etwas mehr Mehl hinein. Wenn er hingegen zu trocken ist, geben Sie einen Löffel griechischen Joghurt hinzu und verrühren Sie alles erneut.
- Den Teig auf eine saubere, bemehlte Fläche geben und etwa eine Minute lang schnell kneten, bis er glatt ist.
- Teilen Sie den Teig in 4 gleich große Stücke. Rollen Sie jedes Stück zu einer glatten Kugel, um Ihre Brötchen zu formen.
- Legen Sie das Proteinbrot auf das vorbereitete, mit Backpapier ausgelegte Backblech.
- Im vorgeheizten Backofen 20 bis 25 Minuten backen. Das Proteinbrot ist fertig, wenn die Oberseite goldbraun ist.
- Nehmen Sie das Brot nach dem Backen aus dem Ofen und lassen Sie es vor dem Servieren mindestens 15 Minuten abkühlen.
So servieren Sie Proteinbrot
Protein bread can be served in numerous ways. Slice it and use it for sandwiches filled with lean meats, veggies, and spreads. You can also toast the slices and top them with nut butter, avocado, or your favorite jam. For a hearty breakfast, enjoy it with eggs or a bowl of yogurt and fruit. The versatility of this protein bread makes it suitable for any meal of the day.
How to store Protein Bread
To keep your protein bread fresh, store it in an airtight container at room temperature. It is best consumed within 2 to 3 days. If you want it to last longer, consider freezing it. Wrap the cooled bread tightly in plastic wrap or foil and place it in a freezer-safe bag. It can last up to 3 months in the freezer. When ready to eat, simply thaw it at room temperature or pop it in the toaster.
Tips to make Protein Bread
- Make sure to measure your flour accurately; use the spoon-and-level method. Scoop flour into the measuring cup with a spoon and level it off without packing it down.
- For additional flavor, consider adding herbs or spices to the dry mixture.
- Experiment with different types of yogurt, such as flavored Greek yogurt, to add a unique twist to your protein bread.
- If you want a sweeter bread, feel free to add a tablespoon or two of honey or maple syrup to the mix.
Variation (if any)
You can easily customize this protein bread. Try incorporating seeds like chia or flaxseeds for extra texture and nutrition. Alternatively, mix in some nuts or dried fruits for added flavor. For a savory version, add cheese or olives to the dough. The possibilities are endless, allowing you to create a protein bread that meets your taste preferences.
FAQs
Can I use other types of flour?
Yes, you can use other types of flour such as almond flour or oat flour, but the texture may vary. You might need to adjust the quantities and possibly add more binding agents since these flours behave differently compared to wheat flour.
Is this bread gluten-free?
No, this recipe is not gluten-free as it contains whole wheat or all-purpose flour. However, you can modify it to be gluten-free by using a gluten-free flour blend.
Can I make this bread ahead of time?
Absolutely! You can make the dough in advance and keep it in the fridge for up to 24 hours before baking.
How do I know when the bread is done?
The bread is done when the top is golden brown, and it sounds hollow when tapped on the bottom. An internal temperature of 200°F (93°C) is also a good indicator.
Overall, protein bread is a smart addition to your meal plan. It is simple to make, delicious, and nutritious. Enjoy your homemade protein bread as a great source of energy, protein, and flavor in your diet!
Total prep time: 15 minutes
Total cook time: 25 minutes
Servings: About 4 buns
Nährwertangaben (pro Brötchen):
Kalorien: 150
Protein: 10 g
Kohlenhydrate: 26 g
Fett: 2 g
Ballaststoffe: 3 g
Natrium: 150 mg